Marbled Vanilla Chocolate Cake
Highlighted under: Bakery-Style Treat Recipes
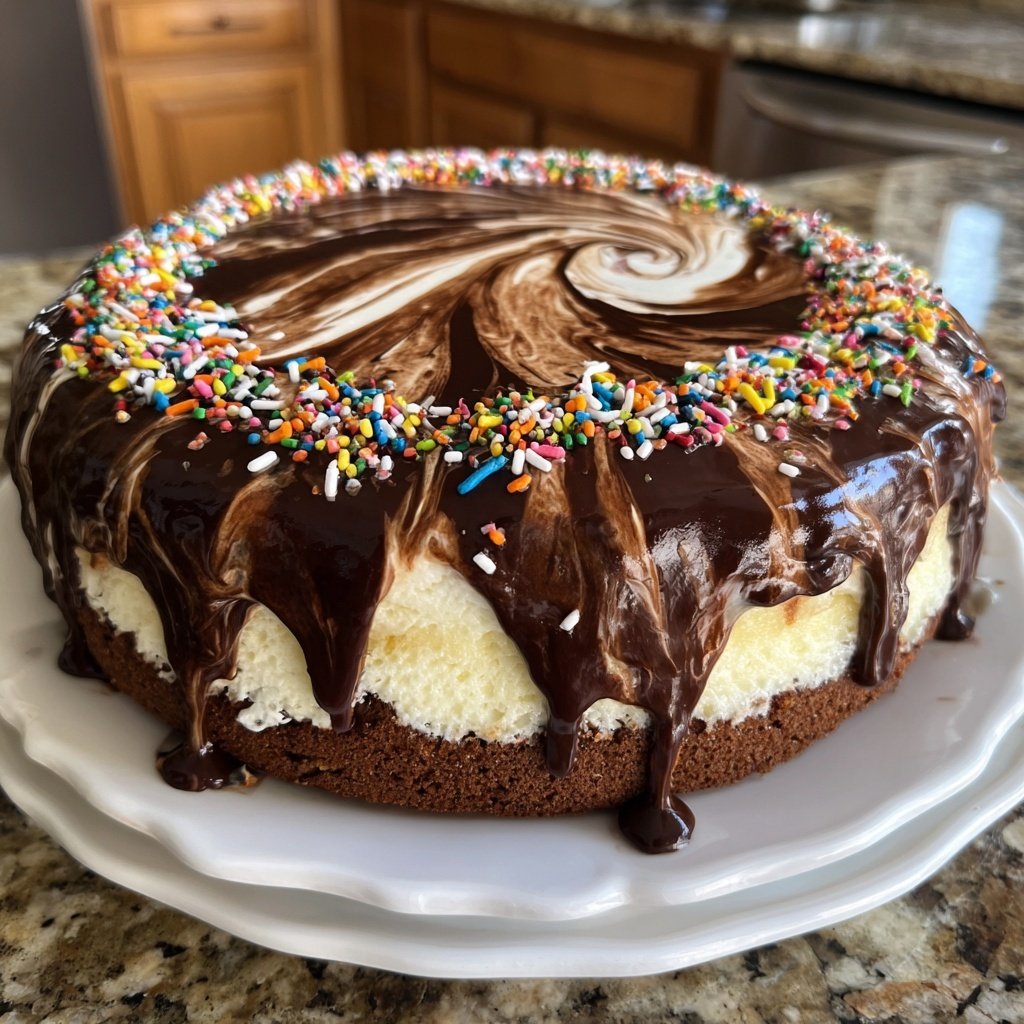
I absolutely love baking, and this Marbled Vanilla Chocolate Cake has become one of my favorite recipes to make. Each time I whip it up, the delightful combination of vanilla and chocolate creates a stunning visual and tantalizing flavor that amazes everyone who tries it. The contrasting colors of the batter come together beautifully, and while it may look intricate, the method is surprisingly easy. Perfect for any occasion, this cake is truly a showstopper that never fails to impress friends and family alike.
This Marbled Vanilla Chocolate Cake has a special place in my heart. I remember the first time I made it for my best friend's birthday. The way the chocolate and vanilla swirled together created a beautiful pattern, and the aroma wafting through the kitchen was heavenly.
What I love the most is how the flavors meld perfectly. Using high-quality cocoa powder ensures a rich chocolate taste that complements the sweet vanilla beautifully. Swirling the batter just right is key—too much mixing can dull the marbled effect, so I recommend being gentle and deliberate for the best presentation.
Why You'll Love This Recipe
- Elegant marbled design that impresses visually
- Perfectly balanced flavors of rich chocolate and sweet vanilla
- Moist, tender crumb that delights with every bite
- Ideal for celebrations or as a delightful dessert treat
Mastering the Marble Effect
Creating the perfect marble effect in your cake is both an art and a science. The key lies in alternating the vanilla and chocolate batters in each cake pan. Don’t just plop them in randomly; instead, aim for a visually appealing pattern. Use a spoon to dollop alternate spoonfuls of each batter, allowing them to touch if possible. This technique not only deepens the marble effect but also ensures that each slice offers a delightful presentation.
After dolloping the batters, it’s time to swirl! Use the tip of a butter knife or a skewer to gently integrate the two batters. I recommend doing this with a light hand; too much mixing will turn your marbling into a muddy mix. Aim for a few swirls, creating a captivating look while keeping the distinct lines. The batter should still look somewhat separate before it goes into the oven.
Importance of Ingredient Quality
Using quality ingredients in this Marbled Vanilla Chocolate Cake can dramatically elevate its flavor. Opt for high-quality unsweetened cocoa powder; it directly influences the taste of the chocolate component. Brands like Valrhona or Ghirardelli provide a rich flavor profile that greatly enhances your cake’s depth. Similarly, use fresh eggs and real vanilla extract, as these add sweetness and aroma that artificial flavorings simply can’t replicate.
Butter also plays a crucial role in achieving that moist and tender crumb. Ensuring that your butter is at room temperature allows it to cream more effectively with sugar, trapping air and leading to a lighter cake texture. If you need a dairy-free option, consider a vegan butter substitute that matches the consistency of regular butter to keep the cake's texture balanced.
Storage and Serving Suggestions
Once your Marbled Vanilla Chocolate Cake has cooled completely, it can be stored at room temperature in an airtight container for up to three days. For longer storage, consider freezing slices wrapped tightly in plastic wrap and foil. Thaw them overnight in the refrigerator when ready to enjoy, and they’ll taste freshly baked. Avoid refrigerating the entire cake, as this could dry it out.
When serving, a dusting of powdered sugar adds a simple touch that doesn’t overshadow the gorgeous marbled design. For an extra indulgence, pair slices with a scoop of vanilla ice cream or a dollop of whipped cream. A drizzle of chocolate ganache can also elevate the experience, making it a dessert that’s sure to impress.
Ingredients
Gather the following ingredients to create the perfect marbled cake:
For the Cake
- 2 cups all-purpose flour
- 1 ½ cups granulated sugar
- 1 cup unsalted butter, softened
- 4 large eggs
- 1 cup buttermilk
- 1 tablespoon vanilla extract
- ¾ cup unsweetened cocoa powder
- 1 ½ teaspoons baking powder
- 1 teaspoon baking soda
- ½ teaspoon salt
Once you have all your ingredients collected, you’re ready to start baking!

Instructions
Follow these simple steps to create your beautiful marbled cake:
Preheat the Oven
Preheat your oven to 350°F (175°C) and grease and flour two 9-inch round cake pans.
Mix the Wet Ingredients
In a large mixing bowl, cream together the softened butter and granulated sugar until light and fluffy. Add the eggs one at a time, mixing well after each addition. Then stir in the buttermilk and vanilla extract.
Combine the Dry Ingredients
In a separate bowl, whisk together the flour, baking powder, baking soda, cocoa powder, and salt.
Combine Wet and Dry Mixtures
Gradually add the dry ingredients to the wet mixture, mixing until just combined.
Create the Marble Effect
Divide the batter into two bowls. Leave one bowl as is and mix the cocoa powder into the other. In both pans, alternate spoonfuls of vanilla and chocolate batter, then use a knife to gently swirl the mixtures together.
Bake the Cake
Bake in the preheated oven for about 30 minutes, or until a toothpick inserted into the center comes out clean. Allow to cool in the pans for 10 minutes before transferring to a wire rack.
Once cooled, frost as desired and enjoy your delicious cake!
Pro Tips
- For an extra touch, try adding a vanilla or chocolate frosting between the layers and on top. This enhances the flavor and adds a beautiful finish.
Troubleshooting Common Issues
If your cake comes out dry, it might be overbaked. Always start checking for doneness a few minutes before the recommended bake time by inserting a toothpick into the center. It should come out with a few moist crumbs, rather than completely clean. Adjusting baking times based on your oven’s true performance is important; oven thermometers can be a handy tool.
On the other hand, if your cake domes too much, causing uneven layers, it may be due to oven temperature being too high. Consider lowering the temperature by about 25°F (10°C) and baking longer. This not only helps in achieving an even rise but also results in a more tender crumb that complements the marbling.
Scaling the Recipe
If you're baking for a larger crowd, this recipe can easily be doubled to make a larger cake or more layers. Simply multiply all ingredients by two, and consider using a 9x13-inch pan if you prefer a single-layer cake. Adjust baking time slightly, checking for doneness a few minutes earlier as larger cakes can sometimes bake unevenly.
Conversely, if you only need a small cake, you can halve the ingredients. Use smaller cake pans, such as 6-inch round pans, and adjust the baking time accordingly. Remember to monitor closely, as smaller cakes can bake quickly and be prone to drying out.
Questions About Recipes
→ Can I substitute the buttermilk?
Yes, you can use regular milk with a tablespoon of vinegar or lemon juice added to replicate buttermilk.
→ How do I store leftovers?
Store the cake in an airtight container at room temperature for up to 3 days or refrigerate for up to a week.
→ Can I freeze this cake?
Absolutely! Wrap the cooled cake layers tightly in plastic wrap and freeze for up to 3 months.
→ What can I use for frosting?
You can use a simple buttercream, cream cheese frosting, or even ganache for a rich topping.
Marbled Vanilla Chocolate Cake
Created by: The Thacozyspoon Team
Recipe Type: Bakery-Style Treat Recipes
Skill Level: Intermediate
Final Quantity: 12 servings
What You'll Need
For the Cake
- 2 cups all-purpose flour
- 1 ½ cups granulated sugar
- 1 cup unsalted butter, softened
- 4 large eggs
- 1 cup buttermilk
- 1 tablespoon vanilla extract
- ¾ cup unsweetened cocoa powder
- 1 ½ teaspoons baking powder
- 1 teaspoon baking soda
- ½ teaspoon salt
How-To Steps
Preheat your oven to 350°F (175°C) and grease and flour two 9-inch round cake pans.
In a large mixing bowl, cream together the softened butter and granulated sugar until light and fluffy. Add the eggs one at a time, mixing well after each addition. Then stir in the buttermilk and vanilla extract.
In a separate bowl, whisk together the flour, baking powder, baking soda, cocoa powder, and salt.
Gradually add the dry ingredients to the wet mixture, mixing until just combined.
Divide the batter into two bowls. Leave one bowl as is and mix the cocoa powder into the other. In both pans, alternate spoonfuls of vanilla and chocolate batter, then use a knife to gently swirl the mixtures together.
Bake in the preheated oven for about 30 minutes, or until a toothpick inserted into the center comes out clean. Allow to cool in the pans for 10 minutes before transferring to a wire rack.
Extra Tips
- For an extra touch, try adding a vanilla or chocolate frosting between the layers and on top. This enhances the flavor and adds a beautiful finish.
Nutritional Breakdown (Per Serving)
- Calories: 380 kcal
- Total Fat: 26g
- Saturated Fat: 15g
- Cholesterol: 195mg
- Sodium: 85mg
- Total Carbohydrates: 32g
- Dietary Fiber: 3g
- Sugars: 24g
- Protein: 6g