Devil's Food Chocolate Cake
Highlighted under: Bakery-Style Treat Recipes
When I decided to make this Devil's Food Chocolate Cake, I knew I wanted something that would satisfy my deepest chocolate cravings. The combination of rich cocoa and the lightness of whipped egg whites creates a cake that is both dense and airy. I've experimented with several recipes, and this one stands out with its moist crumb and decadent frosting. The best part? It comes together surprisingly quickly, making it perfect for last-minute gatherings or just a cozy night in with loved ones.
Baking this cake was a delight from start to finish. The moment I combined the dry ingredients with the wet, the rich aroma of chocolate wafted through my kitchen, making it impossible not to sneak a taste. To ensure the cake rises beautifully, I whipped the egg whites until they formed stiff peaks, incorporating air that gives it that light texture while keeping the chocolate essence front and center.
Moreover, using buttermilk instead of regular milk adds a wonderful tanginess that balances the sweetness of the chocolate, enhancing the overall flavor. I also recommend letting the cake cool completely before frosting—this helps the frosting spread evenly without melting, creating a perfectly layered cake that is as pleasing to the eye as it is to the palate.
Why You'll Love This Recipe
- Rich chocolate flavor paired with fresh orange zest
- Creamy texture that melts in your mouth
- Perfect for celebrations or as a sweet indulgence
The Role of Cocoa Powder
The choice of cocoa powder in this Devil's Food Chocolate Cake is crucial for achieving the desired rich, chocolatey flavor. Unsweetened cocoa powder lends a deep color and intense flavor that sweetened cocoa can't replicate. When selecting your cocoa, consider using Dutch-processed cocoa for a milder, smoother flavor, or stick with natural cocoa for more acidity and brightness in taste. Either way, ensure it is fresh for optimum flavor; stale cocoa can lead to dull, lackluster results.
Incorporating the cocoa powder correctly also affects the cake's final texture. This recipe calls for sifting the cocoa with the other dry ingredients, which helps prevent clumping and ensures an even distribution of flavor. In turn, this contributes to the cake's airy crumb. Just remember, not all cocoa powders are created equal—always check the product for its fat content to gauge richness.
The Importance of Buttermilk
Buttermilk serves a dual purpose in this recipe: it adds moisture while also helping to create a tender crumb. The acidity of buttermilk interacts with the baking powder and baking soda, promoting a light and airy rise. If you don't have buttermilk on hand, you can make a quick substitute by combining 1 cup of milk with 1 tablespoon of lemon juice or white vinegar. Let it sit for about 5-10 minutes; the acidity will mimic that of buttermilk in your batter.
Additionally, buttermilk can enhance the overall flavor profile of your cake. Its tangy notes balance the sweetness of sugar, ensuring that the cake doesn’t become overly sweet. This balance is especially important as the frosting is quite sweet, so the cake itself needs to complement that without competing against it.
Storing and Serving Suggestions
This Devil's Food Chocolate Cake can be stored at room temperature for up to three days in an airtight container; it stays moist and delicious during this time. For longer storage, consider refrigerating it, where it can stay fresh for up to a week. If you have leftover cake, wrapping individual slices in plastic wrap before freezing allows you to thaw just the portions you crave. It's best to consume frozen cake within three months for optimum taste quality.
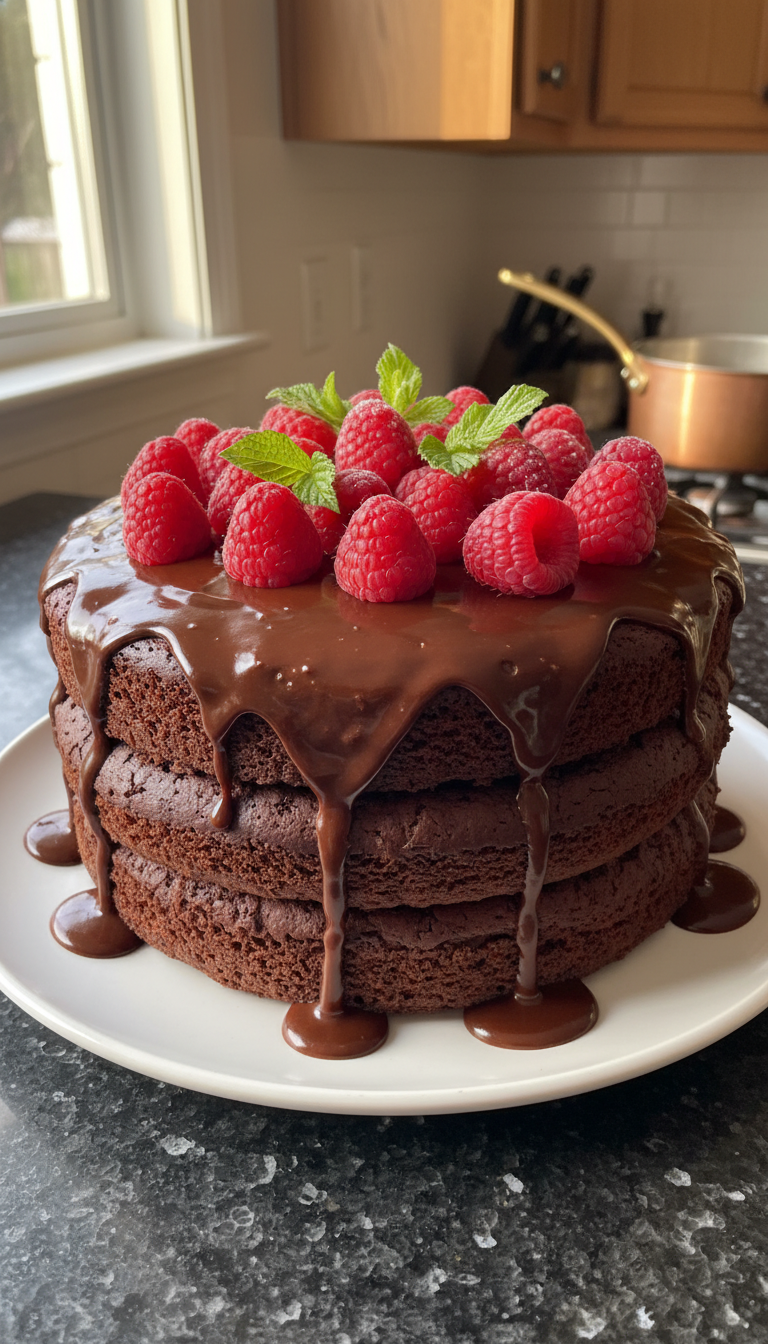
When serving, consider pairing this rich cake with a scoop of vanilla ice cream or a dollop of freshly whipped cream to cut through the cake's density. For a festive touch, garnish with fresh berries or a sprinkle of sea salt atop the frosting to enhance the chocolate flavor. If you're feeling adventurous, add a layer of orange zest in the frosting to accentuate the chocolate—this fusion creates an unexpected yet delightful taste contrast!
Ingredients
Gather these ingredients to get started:
Cake Ingredients
- 1 3/4 cups all-purpose flour
- 3/4 cup unsweetened cocoa powder
- 2 cups granulated sugar
- 1 1/2 tsp baking powder
- 1 1/2 tsp baking soda
- 1 tsp salt
- 2 large eggs
- 1 cup buttermilk
- 1 cup warm water
- 1/2 cup vegetable oil
- 2 tsp vanilla extract
- 1/2 tsp espresso powder (optional)
Frosting Ingredients
- 1/2 cup unsalted butter (softened)
- 2/3 cup unsweetened cocoa powder
- 3 cups powdered sugar
- 1/3 cup milk
- 1 tsp vanilla extract
Now that you have all the ingredients, let's start baking!
Instructions
Follow these steps for a perfect Devil's Food Cake:
Prepare the Oven and Pans
Preheat your oven to 350°F (175°C). Grease and flour two 9-inch round cake pans.
Mix Dry Ingredients
In a large bowl, whisk together the flour, cocoa powder, sugar, baking powder, baking soda, and salt.
Combine Wet Ingredients
In another bowl, beat the eggs, buttermilk, warm water, oil, and vanilla extract until well combined.
Combine Mixtures
Gradually add the wet mixture to the dry ingredients, mixing until just combined. Be careful not to overmix.
Bake the Cakes
Divide the batter evenly between the prepared cake pans and bake for 30 minutes. A toothpick should come out clean.
Cool the Cakes
Allow the cakes to cool in the pans for 10 minutes, then transfer to wire racks to cool completely.
Make the Frosting
In a mixing bowl, combine the softened butter, cocoa powder, powdered sugar, milk, and vanilla. Beat until smooth and creamy.
Assemble the Cake
Place one cake layer on a serving plate, spread frosting on top, then place the second layer on top and frost the top and sides.
Serve and Enjoy
Slice the cake and serve it at room temperature. Enjoy your rich, chocolatey creation!
Now sit back and indulge in your homemade Devil's Food Chocolate Cake!
Pro Tips
- For an extra burst of flavor, consider adding a hint of orange zest to the frosting or cake batter. It really elevates the chocolate profile!
Common Troubleshooting Tips
If your cake layers rise unevenly or dome in the middle, ensure you are properly measuring ingredients and accurately preheating your oven. An oven thermometer can help check for hot spots that may cause uneven baking. If your cake still domes, after baking, you can trim the tops with a serrated knife for even stacking during assembly. Remember, each oven behaves differently; baking times may need slight adjustments, so keep an eye on your cakes towards the end of the baking time.
Should the frosting turn out too thick, you can easily remedy it by adding an extra splash of milk to achieve a smoother consistency. Conversely, if the frosting is too runny, adding more powdered sugar will thicken it up effectively. Don't hesitate to taste-test along the way to ensure it meets your sweetness and richness standards—after all, that's what makes a decadent chocolate frosting truly unforgettable!
Scaling Up or Down
If you're looking to scale this recipe, perhaps for a larger gathering, you can easily double the ingredients to create a four-layer cake. Just be sure to increase your baking time and use larger pans. For smaller occasions, this recipe can be halved. Bake any excess batter in cupcake tins for mini treat variations, ensuring they bake for about 20-25 minutes instead of the full cake layers.
For making cupcakes, this batter produces about 24 standard-sized cupcakes. Just fill each liner about two-thirds full to allow room for rising, and frost once they are completely cool. This way, you’ll have bite-sized treats perfect for parties or lunchboxes, which carry all the rich flavor of the original cake while being more manageable to serve.
Questions About Recipes
→ Can I make this cake gluten-free?
Yes, you can substitute all-purpose flour with a gluten-free flour blend that is designed for baking.
→ How do I store the leftover cake?
Store any leftover cake in an airtight container at room temperature for up to three days or refrigerate for longer freshness.
→ Can I freeze the cake?
Yes, to freeze, wrap the cooled cake tightly in plastic wrap and foil. It can be frozen for up to three months.
→ What is the best way to frost the cake?
Make sure your cake is completely cooled before frosting. Use a serrated knife to level the tops for an even layer, and start with a crumb coat before the final layer.
Devil's Food Chocolate Cake
Created by: The Thacozyspoon Team
Recipe Type: Bakery-Style Treat Recipes
Skill Level: Intermediate
Final Quantity: 8 servings
What You'll Need
Cake Ingredients
- 1 3/4 cups all-purpose flour
- 3/4 cup unsweetened cocoa powder
- 2 cups granulated sugar
- 1 1/2 tsp baking powder
- 1 1/2 tsp baking soda
- 1 tsp salt
- 2 large eggs
- 1 cup buttermilk
- 1 cup warm water
- 1/2 cup vegetable oil
- 2 tsp vanilla extract
- 1/2 tsp espresso powder (optional)
Frosting Ingredients
- 1/2 cup unsalted butter (softened)
- 2/3 cup unsweetened cocoa powder
- 3 cups powdered sugar
- 1/3 cup milk
- 1 tsp vanilla extract
How-To Steps
Preheat your oven to 350°F (175°C). Grease and flour two 9-inch round cake pans.
In a large bowl, whisk together the flour, cocoa powder, sugar, baking powder, baking soda, and salt.
In another bowl, beat the eggs, buttermilk, warm water, oil, and vanilla extract until well combined.
Gradually add the wet mixture to the dry ingredients, mixing until just combined. Be careful not to overmix.
Divide the batter evenly between the prepared cake pans and bake for 30 minutes. A toothpick should come out clean.
Allow the cakes to cool in the pans for 10 minutes, then transfer to wire racks to cool completely.
In a mixing bowl, combine the softened butter, cocoa powder, powdered sugar, milk, and vanilla. Beat until smooth and creamy.
Place one cake layer on a serving plate, spread frosting on top, then place the second layer on top and frost the top and sides.
Slice the cake and serve it at room temperature. Enjoy your rich, chocolatey creation!
Extra Tips
- For an extra burst of flavor, consider adding a hint of orange zest to the frosting or cake batter. It really elevates the chocolate profile!
Nutritional Breakdown (Per Serving)
- Calories: 380 kcal
- Total Fat: 26g
- Saturated Fat: 15g
- Cholesterol: 195mg
- Sodium: 85mg
- Total Carbohydrates: 32g
- Dietary Fiber: 3g
- Sugars: 24g
- Protein: 6g