Chocolate Dipped Spring Cookies
Highlighted under: Bakery-Style Treat Recipes
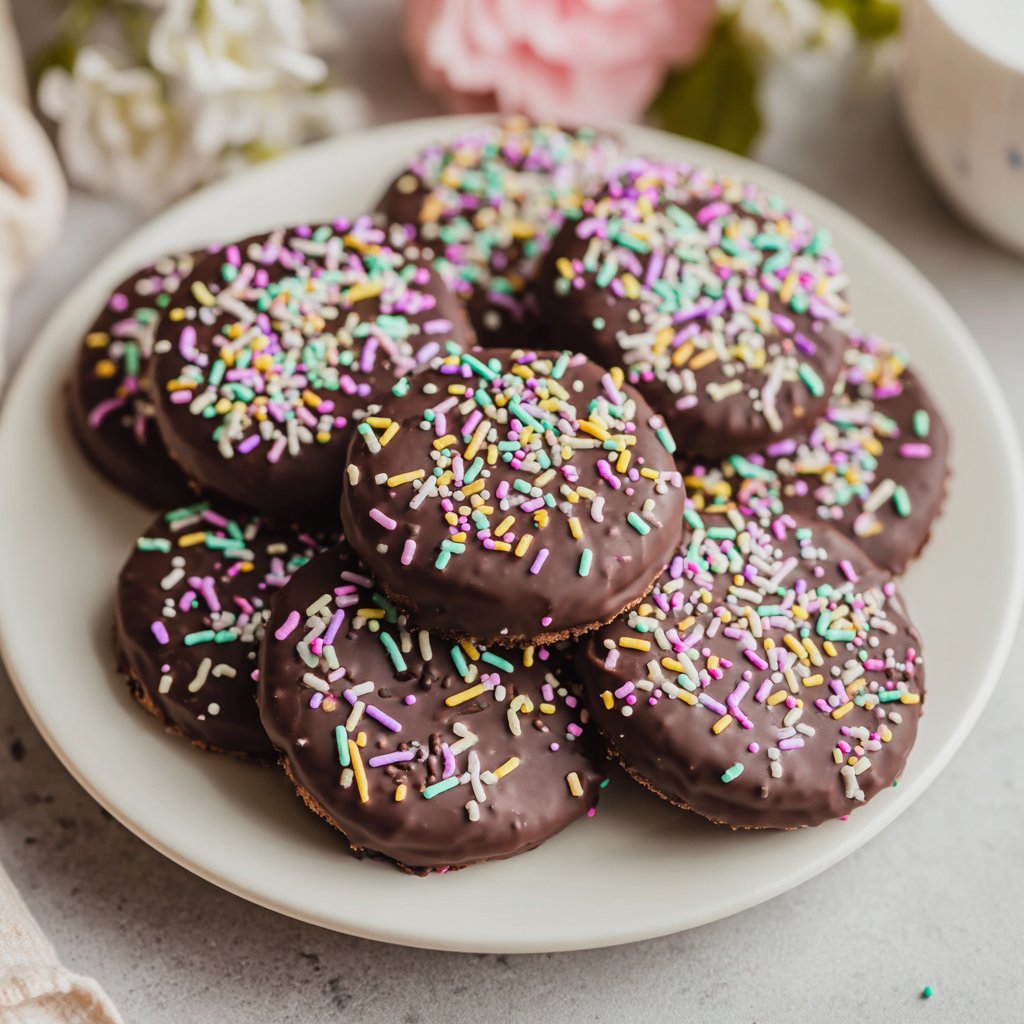
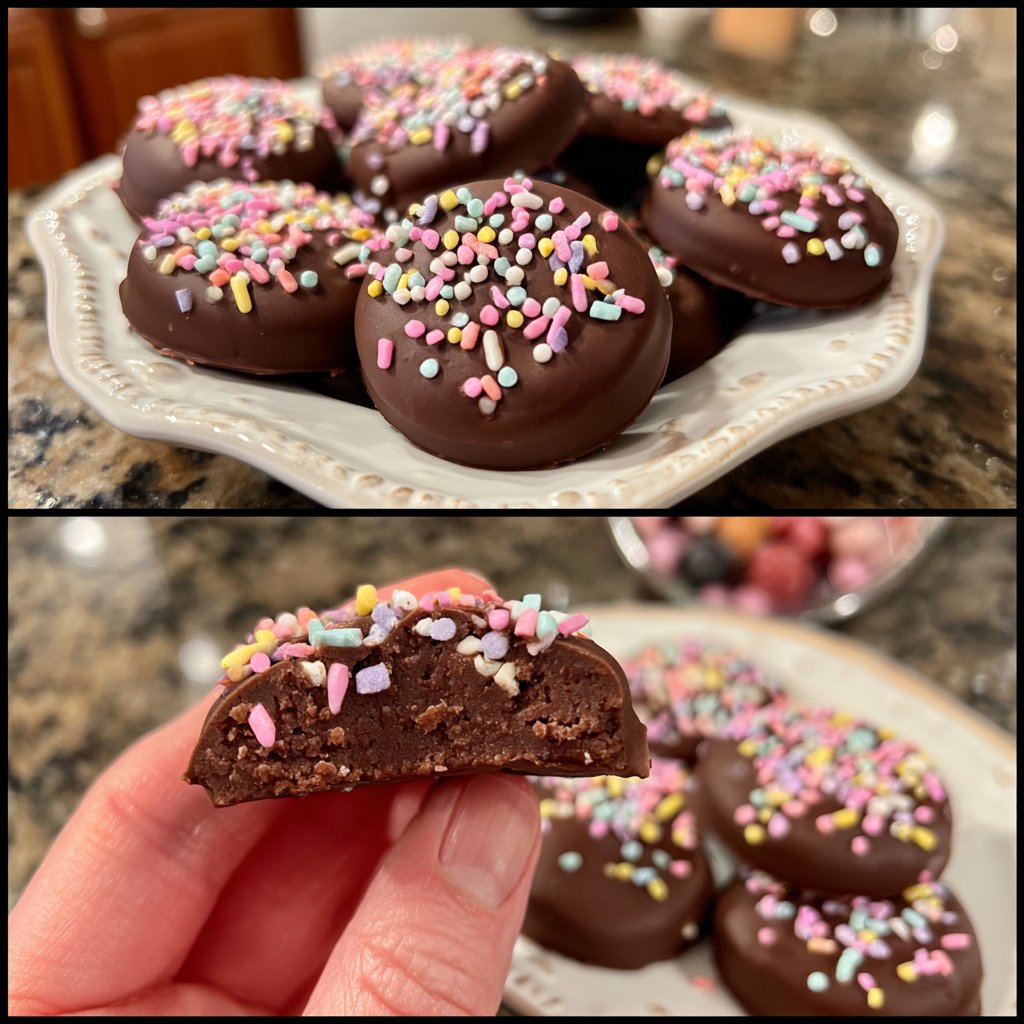
I absolutely love making these Chocolate Dipped Spring Cookies; they bring a burst of joy to any gathering. The combination of buttery cookies with rich chocolate creates a delightful treat that's perfect for spring. I enjoy getting creative with the toppings, like sprinkles or crushed nuts, and I often involve my kids in the decoration process. It’s a fun way to spend time together while whipping up something sweet. Each bite is like a little celebration of springtime flavors, and I can't wait to share this recipe with you!
During my last cookie-making session, I experimented with these Chocolate Dipped Spring Cookies. I was amazed by how the citrus zest complemented the chocolate, giving it a refreshing twist. The trick is to make sure the cookies are completely cooled before dipping; otherwise, the chocolate will melt and mess up your beautiful design.
I also tried different types of chocolate for dipping—from dark to white chocolate—and found that each brought out different nuances in flavor. It's fascinating how a small change can transform the entire dessert. Plus, the colorful sprinkles on top bring an extra layer of spring cheer!
Why You'll Love These Cookies
- Irresistibly sweet taste with the perfect crunch
- Versatile decoration options to suit any occasion
- A delightful combination of flavors that feel like spring
The Role of Key Ingredients
The base of these cookies relies heavily on unsalted butter, which contributes to the rich, buttery flavor while also ensuring the cookies have a tender texture. Softening the butter to room temperature is crucial; this allows for better incorporation of air, resulting in a lighter cookie. Make sure to cream the butter and sugar thoroughly until the mixture appears fluffy and pale—this can take about 3-5 minutes with an electric mixer.
In addition to butter, the inclusion of orange zest brightens the flavor profile of these cookies. Citrus oil in the zest adds aromatic notes that beautifully complement the richness of the chocolate. If fresh orange is unavailable, substitute with lemon or even a drop of pure orange extract, but be careful as a little goes a long way.
Perfecting the Cookie Texture
Baking technique is crucial for achieving the perfect cookie texture. When rolling the dough into balls, aim for uniform size to ensure they bake evenly. Flattening the balls slightly will help them spread during baking, leading to a lovely chewy center. Keep a close eye on the oven; removing them as soon as the edges are golden will yield a soft cookie that remains delightful even after cooling. Cook them for 12-15 minutes, but note your oven may vary, so consider rotating the tray halfway through for even baking.
For those who prefer a crisper cookie, you can slightly extend the baking time to 15-18 minutes. Just be cautious not to overbake, as it can diminish the soft texture inside. If you want to play with the cookie's thickness, chilling the dough for about 30 minutes before rolling and baking can lead to thicker cookies that hold their shape better.
Decorating Your Cookies
Once your cookies are cooled and dipped in chocolate, the real fun begins with the toppings! Using a variety of sprinkles, crushed nuts, or shredded coconut can make each cookie unique and festive. Just remember to apply these toppings while the chocolate is still wet; this helps them stick better, ensuring a delightful crunch with each bite. I personally love using an assortment of colors to cater to seasonal themes, like pastel sprinkles for spring.
If you're feeling extra adventurous, consider adding a drizzle of white chocolate over the dipped cookies for an elegant touch. To achieve a smooth drizzle, melt the white chocolate similarly to the semi-sweet chocolate, but use a piping bag or a fork for easy application. Alternatively, these cookies can also be left unadorned, allowing the rich chocolate flavor to shine through.
Ingredients
Gather the following ingredients to start making your delicious cookies:
For the Cookies
- 1 cup unsalted butter, softened
- 1 cup granulated sugar
- 1 large egg
- 1 teaspoon vanilla extract
- 2 cups all-purpose flour
- 1 teaspoon baking powder
- 1/2 teaspoon salt
- 1 tablespoon orange zest
For the Chocolate Coating
- 1 cup semi-sweet chocolate chips
- 1 tablespoon coconut oil
Optional Toppings
- Sprinkles
- Crushed nuts
- Shredded coconut
Make sure to have all your ingredients ready before you start baking!
Instructions
Follow these steps to create your Chocolate Dipped Spring Cookies:
Prepare the Cookie Dough
In a large mixing bowl, cream together the softened butter and granulated sugar until light and fluffy. Add the egg and vanilla extract, mixing well. Slowly incorporate the all-purpose flour, baking powder, salt, and orange zest until a dough forms.
Shape and Bake the Cookies
Preheat your oven to 350°F (175°C). Roll the dough into small balls and place them on a lined baking sheet. Flatten each ball slightly with your hand. Bake for 12-15 minutes, or until the edges are golden brown. Let them cool completely on a wire rack.
Prepare the Chocolate Coating
In a heatproof bowl, combine the semi-sweet chocolate chips and coconut oil. Melt in the microwave in 30-second intervals, stirring in between until smooth.
Dip the Cookies
Once the cookies are completely cooled, dip half of each cookie into the melted chocolate, allowing any excess to drip off. Place the dipped cookies on a parchment-lined tray.
Add Toppings and Set
Sprinkle your choice of toppings on the chocolate while it's still wet. Allow the chocolate to set at room temperature or pop them in the fridge for quicker results.
Now, enjoy your delicious Chocolate Dipped Spring Cookies with family and friends!
Pro Tips
- For a colorful presentation, consider using colored sprinkles or edible flowers as toppings. Additionally, feel free to experiment with different flavors of zest to find your favorite combination!
Storage and Make-Ahead Tips
These Chocolate Dipped Spring Cookies can be made ahead of time, making them perfect for gatherings or as a sweet treat throughout the week. Store the completely cooled and decorated cookies in an airtight container at room temperature—just be sure to separate layers with parchment paper to prevent sticking. They’ll stay fresh for about 4-5 days, maintaining their lovely texture and flavor.
If you'd like to freeze these cookies, you can do so either before or after dipping them in chocolate. Place the cookies in a single layer on a baking sheet to freeze individually, then transfer them to a freezer-safe bag once solid. They can be frozen for up to three months. To enjoy, simply thaw at room temperature or pop them in the microwave for a few seconds to regain a soft texture.
Troubleshooting Common Issues
If you find your cookies spreading too much while baking, it may be due to warmer butter or not enough flour in the dough. Make sure the butter is soft but not melted; it should leave an indentation when pressed but maintain its shape. If the dough feels too sticky, adding a tablespoon of flour at a time can help achieve a more manageable consistency without sacrificing the cookie's flavor.
Sometimes, the chocolate coating might not be glossy or could appear dull; this could happen if the chocolate was overheated. Always melt in short intervals and stir frequently until smooth. If you find your chocolate thickening, a tiny splash of coconut oil can help restore that silky texture, making it easier to dip the cookies.
Flavor Variations
Feel free to experiment with flavors by incorporating different extracts alongside the vanilla. Almond extract or a touch of peppermint extract can add unique twists to the cookie base. For a richer flavor, consider adding a tablespoon of cocoa powder into the flour mixture to create chocolate-flavored cookies that can be equally dipped in white or dark chocolate.
In addition, swapping out the semi-sweet chocolate for dark chocolate can amplify the richness, while using white chocolate can provide a nice contrast to the cookie's sweetness. Each variation can create a completely different cookie experience, so don't hesitate to conjure up your favorite flavors!
Questions About Recipes
→ Can I use margarine instead of butter?
Yes, margarine can be used, but it may change the flavor slightly.
→ How do I store leftover cookies?
Store them in an airtight container at room temperature for up to a week.
→ Can I freeze the dough?
Absolutely! You can freeze the dough for up to 3 months. Just make sure to wrap it tightly.
→ What other flavorings can I add?
You can experiment with lemon zest, almond extract, or even spices like cinnamon for a unique twist.
Chocolate Dipped Spring Cookies
Created by: The Thacozyspoon Team
Recipe Type: Bakery-Style Treat Recipes
Skill Level: Intermediate
Final Quantity: 24 cookies
What You'll Need
For the Cookies
- 1 cup unsalted butter, softened
- 1 cup granulated sugar
- 1 large egg
- 1 teaspoon vanilla extract
- 2 cups all-purpose flour
- 1 teaspoon baking powder
- 1/2 teaspoon salt
- 1 tablespoon orange zest
For the Chocolate Coating
- 1 cup semi-sweet chocolate chips
- 1 tablespoon coconut oil
Optional Toppings
- Sprinkles
- Crushed nuts
- Shredded coconut
How-To Steps
In a large mixing bowl, cream together the softened butter and granulated sugar until light and fluffy. Add the egg and vanilla extract, mixing well. Slowly incorporate the all-purpose flour, baking powder, salt, and orange zest until a dough forms.
Preheat your oven to 350°F (175°C). Roll the dough into small balls and place them on a lined baking sheet. Flatten each ball slightly with your hand. Bake for 12-15 minutes, or until the edges are golden brown. Let them cool completely on a wire rack.
In a heatproof bowl, combine the semi-sweet chocolate chips and coconut oil. Melt in the microwave in 30-second intervals, stirring in between until smooth.
Once the cookies are completely cooled, dip half of each cookie into the melted chocolate, allowing any excess to drip off. Place the dipped cookies on a parchment-lined tray.
Sprinkle your choice of toppings on the chocolate while it's still wet. Allow the chocolate to set at room temperature or pop them in the fridge for quicker results.
Extra Tips
- For a colorful presentation, consider using colored sprinkles or edible flowers as toppings. Additionally, feel free to experiment with different flavors of zest to find your favorite combination!
Nutritional Breakdown (Per Serving)
- Calories: 150 kcal
- Total Fat: 8g
- Saturated Fat: 5g
- Cholesterol: 25mg
- Sodium: 50mg
- Total Carbohydrates: 20g
- Dietary Fiber: 1g
- Sugars: 10g
- Protein: 2g